
Ever wondered how some Roblox players sport super cool, one-of-a-kind outfits that make their avatars stand out? Well, what if I told you that you could create your own custom shirts? With just a bit of creativity and a few simple steps, you’ll be designing Roblox shirts that show off your unique style.
Whether you’re new to the world of Roblox design or just looking to take your game to the next level, creating custom shirts is easier than you might think. In this guide, I’ll walk you through everything you need to know, from picking the right template to uploading your design. Let’s jump in!
Key Points:
- Custom shirts are a fun way to personalize your avatar.
- You’ll need a shirt template to start designing.
- Alive Studio offers an easy-to-use editor for creating shirts.
- Uploading your creation is simple and straightforward.
- There are design tips to help your shirt stand out.
What is a Roblox Shirt Template?
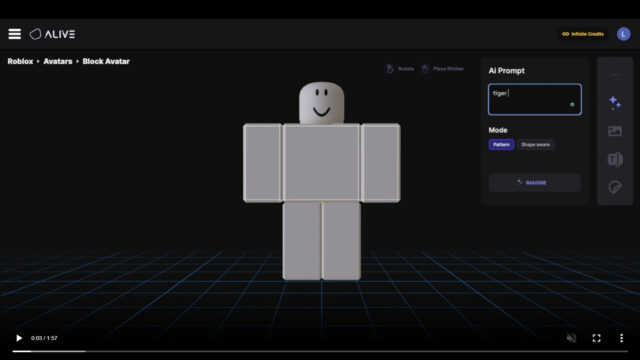
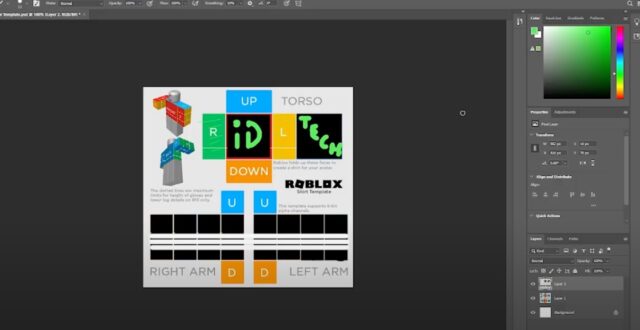
Before you get started, you’ll need a shirt template. This template acts as a guide, giving you the specific areas where your design will appear on the avatar. It’s a .png file with set dimensions that you can customize however you like. Roblox shirt template is a helpful resource. Once you load up the template into Alive Studio, you won’t have to worry about the technical stuff—it’s preloaded and ready for your creative touch.
How to Create a Shirt from Scratch
Ready to get your hands dirty? Let’s go over the steps to create your custom shirt.
Download the Template
First, grab the Roblox shirt template. If you’re using Alive Studio, you don’t even need to download it manually. It’s preloaded and waiting for you to start designing.
Pick Your Tool
You can use any design tool you’re comfortable with. Photoshop, GIMP, or even simpler tools like Paint.NET work perfectly. If you’re new to design, I recommend starting with something user-friendly, like Canva.
Start Designing
Use the template to guide your design. Add cool patterns, logos, or anything else that pops in your mind. Don’t overthink it! Remember, it might look weird now, but trust the process. The magic happens as you add more details.
Export Your Design
Once you’re happy with the design, export it as a .png file. This format ensures that the transparency and quality are preserved when uploading to Roblox.
Design Tips for Standout Roblox Shirts
You want your shirt to stand out, right? Here are some tips that’ll make sure your design doesn’t get lost in the crowd.
- Use Bold Colors: Bright colors and contrasting shades are eye-catching. Try using a bold color scheme that reflects your personal style.
- Stay Simple: Don’t overcomplicate the design. Focus on one or two cool elements that define the look.
- Consider Your Avatar’s Size: Keep in mind that the shirt will be worn by a 3D avatar, so ensure the design fits the dimensions of the shirt properly.
- Avoid Text Overload: Too much text can make your design look cluttered. Keep it simple and let the graphics do the talking.
Pro Tip: If you’re not sure how your design looks on a real avatar, you can always test it in Roblox Studio before uploading. It’ll give you a sneak peek of how your creation fits on a character.
How to Upload and Use Your Custom Shirt
So, you’ve designed your masterpiece. Now it’s time to upload it and show it off!
1. Head to the Roblox Website
- Open Roblox and log in to your account.
2. Go to the Avatar Section
- Click on the “Avatar” section under the “Create” tab. This is where you’ll be able to upload all your custom creations.
3. Upload Your Design
- Look for the “Shirts” section, then select “Upload a Shirt.” Choose the .png file you just created and hit the “Upload” button.
4. Set Your Shirt’s Price (Optional)
- If you want to sell your shirt, set a price. Otherwise, keep it as a personal item.
5. Wear Your New Shirt
- Once it’s uploaded, you can equip your custom shirt directly from your avatar page. Show it off to your friends!
Common Mistakes to Avoid When Designing Roblox Shirts
We’ve all been there—creating something you’re super proud of only to realize later that it’s not quite right. Let’s avoid that frustration. Here are a few common mistakes and how to sidestep them:
1. Ignoring Template Alignment
If your design doesn’t align properly on the shirt template, it could look weird when worn by your avatar. Always double-check the alignment!
2. Overcomplicating the Design
Simplicity is key. Too many details can overwhelm the design and make it hard to see on the avatar.
3. Forgetting About Transparency
Make sure that any parts of your design that should be transparent are actually transparent. Nothing worse than having unwanted backgrounds on your shirt.
4. Uploading in the Wrong Format
Roblox only accepts .png files for custom shirts. If you upload anything else, it won’t work.
FAQs: Your Custom Roblox Shirt Questions Answered
Q: How much does it cost to upload a shirt on Roblox?
A: Uploading a shirt costs 10 Robux. This is a one-time fee per design.
Q: Can I design a shirt for free?
A: Yes! You can create your design and upload it for free. However, you’ll need Robux if you want to sell it.
Q: Can I make shirts for my friends?
A: Yes! You can create shirts and give them to friends. You can also sell them on the Roblox marketplace.
Q: What is the best design tool for beginners?
A: Canva or Paint.NET are great options for beginners. They’re both easy to use and have all the tools you need for simple shirt designs.
Final Thoughts
Creating custom shirts for your Roblox avatar doesn’t have to be complicated. With the right tools and a little creativity, you’ll be designing shirts that are totally unique to you. Remember, the key is to experiment, keep it simple, and have fun with it.
So, grab your template, fire up your favorite design tool, and start creating today! You never know, your design could be the next big hit in the Roblox world.


