If you’re a PlayStation 4 owner, chances are you’ve encountered the dreaded red light on your PS4 controller. When this happens, it can be both frustrating and confusing, especially when you’re in the middle of a game. But don’t worry; we’ve got you covered.
In this comprehensive guide, we’ll go through various troubleshooting methods that can help you get your PS4 controller working properly again. From charging to resetting, we’ll explore a range of possible solutions to ensure you’re back in the game in no time. So, buckle up and get ready to dive into the world of PS4 controller repair!
Check if the PS4 controller is properly charged

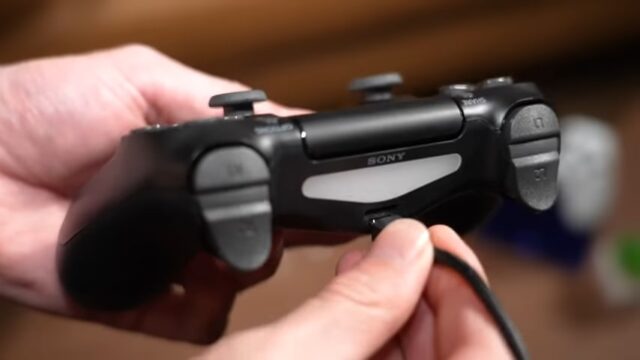
Before diving into more complicated solutions, let’s start with the basics: is your PS4 controller properly charged? A red light may indicate low battery power, which can cause the controller to malfunction. To ensure it is fully charged, follow these steps:
- Connect it to a power source using the provided USB cable.
- Plug the other end of the USB cable into a wall charger or directly into the PS4 console.
- Allow it to charge for at least 2 hours. The light should change from red to orange, indicating it’s charging. When the light turns off, it means it is fully charged.
If your controller is already fully charged, or if the red light persists after charging, proceed to the next troubleshooting step.
Reset the PS4 controller
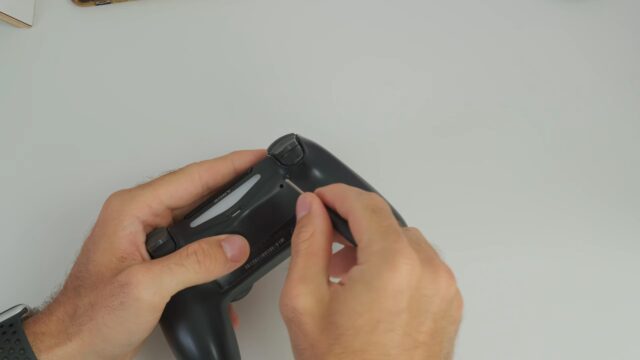
Sometimes, a simple reset can fix a red light issue. To reset your PS4 controller, follow these steps:
- Locate the small reset button on the back of the controller, near the L2 button.
- Use a small object, such as a paper clip or toothpick, to press the button. Gently hold it down for about 5 seconds.
- Release the button and wait a moment for it to reset.
After resetting, reconnect it to the PS4 console and check if the red light issue has been resolved. If not, move on to the next step.
Connect it to the Console
A red light may also indicate a connection issue between the controller and the console. To establish a proper connection, do the following:
- Connect it to the console using a USB cable.
- Press the PlayStation button on the controller. The light should turn blue, indicating a successful connection.
- If the red light persists, it’s time to check your HDMI cable.
Verify the HDMI cable
Faulty HDMI cables can lead to various issues, including the red light on your PS4 controller. To verify if the HDMI cable is the problem, follow these steps:
- Ensure that both ends of the HDMI cable are securely connected to the PS4 console and the TV.
- Test the HDMI cable by connecting it to another device, such as a Blu-ray player or a different console. If the cable works with other devices, it’s likely not the problem.
If you’ve confirmed that the HDMI cable is working properly, proceed to the next troubleshooting step.
Use a different USB cable or charging port
A damaged USB cable or charging port can also cause the red light issue. To rule out these possibilities, try the following:
- Swap the USB cable with another one, and try charging the controller again.
- Test the charging port by connecting the controller to a different USB port on the PS4 console or a wall charger.
Check for any software updates
Outdated software can sometimes cause issues with PS4 controllers. To check for updates, follow these steps:
- On your PS4 console, go to the Settings menu.
- Select “System Software Update” and follow the on-screen instructions if any updates are available.
Additionally, check if there are any firmware updates for it. To do this, connect the controller to the console and navigate to “Devices” in the Settings menu. Then, select “Controllers” and check for updates. Install any available updates and test the controller afterward.
Clean the Dust and Debris
Dust and debris can accumulate inside the charging port of your PS4 controller, causing connection issues and the red light. To clean the charging port, follow these steps:
- Turn it off and unplug it from any power source.
- Use a can of compressed air to blow out any dust or debris from the charging port.
- Make sure to hold the can at least an inch away from the port to avoid damage.
- After cleaning the charging port, try charging the controller again and check if the red light issue has been resolved.
Replace the battery
If none of the previous steps have worked, the red light might indicate a faulty battery. To replace the battery, you’ll need a new battery specifically designed for PS4 controllers and a small screwdriver. Follow these steps:
- Remove the four screws on the back of the controller.
- Carefully lift the back panel to expose the battery.
- Disconnect the battery connector and remove the old battery.
- Insert the new battery and reconnect the battery connector.
- Reassemble the controller by carefully placing the back panel and tightening the screws.
- Test the controller to see if the red light issue has been resolved.
Contact PlayStation Customer Service
In the unlikely event that none of the troubleshooting steps have resolved the red light issue, it’s time to seek professional assistance. You have two options:
- Contact PlayStation customer service. Their support team can provide additional guidance or direct you to an authorized repair center.
- Take your PS4 controller to a local professional repair center that specializes in gaming consoles and controllers.
FAQs
Can I use my PS4 controller while it’s charging?
Yes, you can use it while it’s charging. Simply connect it to the PS4 console or a wall charger using a USB cable, and you can continue playing your favorite games while it charges.
How long does a fully charged PS4 controller last?
It can last for approximately 4-8 hours of continuous gameplay, depending on various factors such as age, the type of game being played, and the features being used (e.g., vibration).
Can dust and debris in the charging port cause the red light issue on my PS4 controller?
Yes, dust and debris can accumulate inside the charging port, causing connection issues and the red light. Cleaning the charging port with a can of compressed air can help resolve this issue.
When should I contact PlayStation customer service or take my controller to a professional repair center?
If none of the troubleshooting steps have resolved the red light issue, it’s time to seek professional assistance. Contact PlayStation customer service or take your PS4 controller to a local professional repair center that specializes in gaming consoles and controllers.
Conclusion
Dealing with it can be frustrating, but with this comprehensive guide, you have a range of troubleshooting methods at your disposal. From charging it to replacing the battery, these steps can help you identify and fix the issue quickly and efficiently. Remember, if none of the steps work, don’t hesitate to contact PlayStation customer service or visit a professional repair center.
The most important thing is to get back into the game and enjoy your gaming experience to the fullest. While it’s essential to address the red light issue, taking preventive measures can also help you avoid potential problems in the future. Keep it clean, ensure it’s charged regularly, and stay up-to-date with software updates.
Properly storing your controller when not in use can prevent damage and extend its lifespan. In conclusion, the key to fixing the red light on your PS4 controller lies in following a systematic troubleshooting approach. Be patient, and don’t be afraid to seek professional assistance if needed. We hope this guide has provided you with valuable insights and solutions to get your PS4 controller back in working order. Now that you’re armed with the knowledge and tools to tackle the red light issue, you can confidently dive back into your favorite games and enjoy hours of entertainment on your PlayStation 4 console. Happy gaming!


