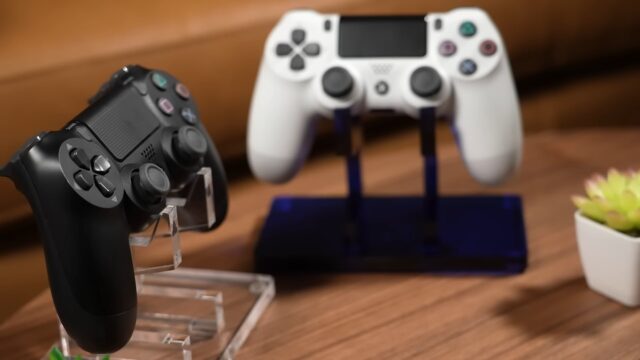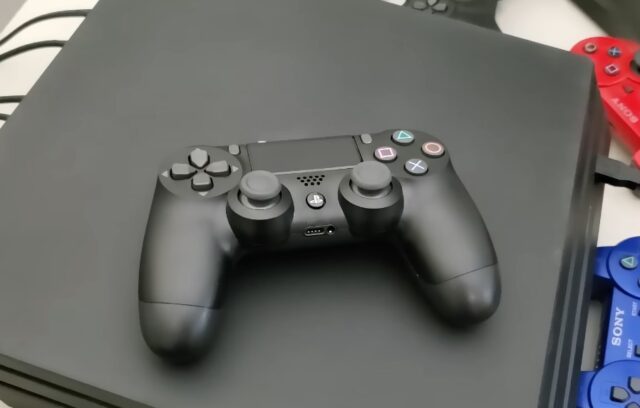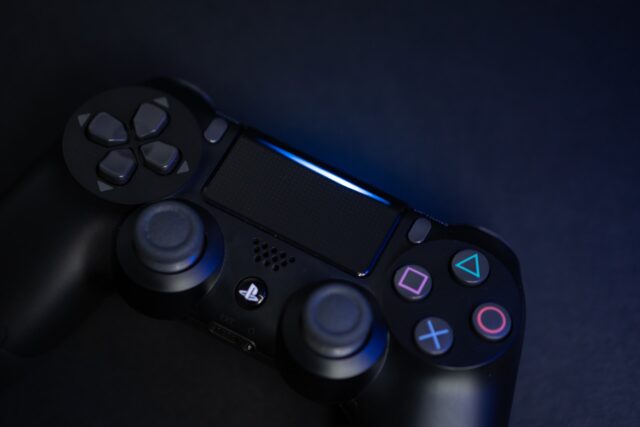
The PlayStation 4 is one of the most popular gaming consoles in the world, and the PS4 controller is an essential part of the gaming experience. However, one common issue that gamers face is the PS4 controller not charging. This can be frustrating, especially if you’re in the middle of an intense gaming session. Fortunately, there are several easy fixes that you can try to resolve this problem. In this article, we will explore 10 different solutions that you can use to fix your PS4 controller and get back to gaming. From checking the charging cable to resetting the controller, we’ve got you covered with easy and practical solutions that can help you resolve this issue quickly. So, if your PS4 controller is not charging, keep reading to learn how you can fix it in no time.
Check the Charging Cable
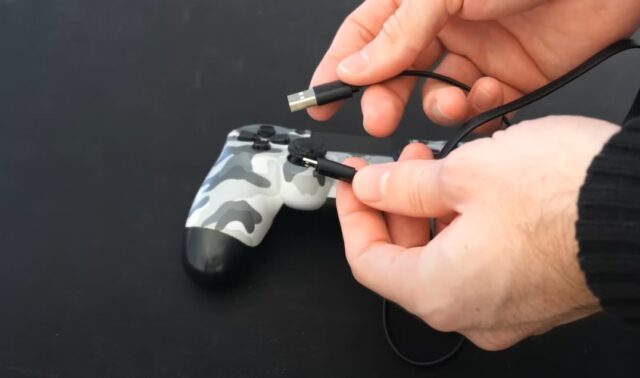
Troubleshooting your PS4 controller is the first step to fixing the issue. One of the simple solutions you should try is to check the charging cable. You should check the ends of the cable to see if the connection is secure or if the cable has any visible damage.
If the cable is damaged, then it won’t be able to transfer power and the controller won’t charge. If everything looks fine, then you should try other solutions.
Ensure the cable is firmly connected
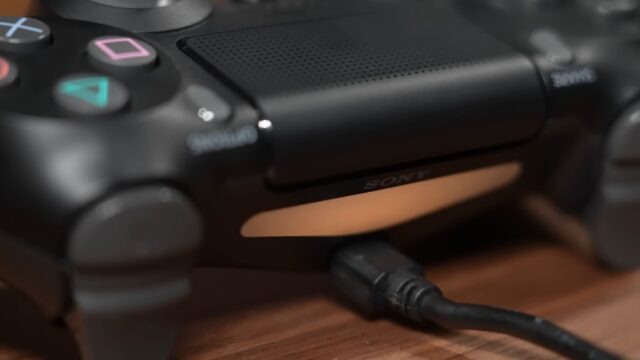
It is important to make sure that the charging cable is connected firmly at both the controller and console ends. Check the port on the back of your console to make sure the USB plug is firmly secured and does not show any signs of damage or corrosion. If it does, then you should buy a new USB connection such as a micro USB or an official Sony USB cable to ensure compatibility with your controller’s internal hardware.
Also check that the cable is plugged into your PS4 controller securely and as far as it will go — some cables have different lengths so if it needs stretching further, verify that it won’t damage anything permanently. If after ensuring a firm connection there are still no indicator lights displayed, prepare for a more thorough exploration of possible fixes.
Check for physical damage to the cable
When troubleshooting a PS4 controller that won’t charge, visual inspection is an important first step. Check the cable for signs of physical damage, such as loose connections or frayed wires. If the cable appears to be in poor condition, it’s best to replace it before proceeding with other fixes.
Afterward, test if the controller is still not charging by connecting it to another charging cable of similar quality and length. Additionally, verify that the PS4 USB ports are functioning with an external device, like a flash drive or portable hard drive. If the second cable works significantly better than the original, then you may want to consider switching chargers entirely.
Check the USB Port
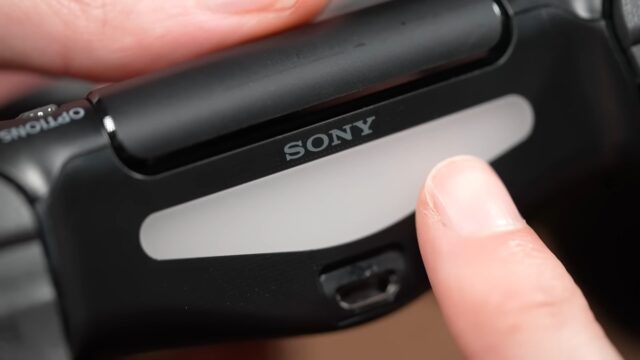
Before trying any of the other fixes, it’s important to check the USB port of your PS4 controller. Make sure that the port is clean and free of any dust or debris. If there’s any dirt or residue in the port, use a cotton swab dipped in rubbing alcohol to clean it out. You should also make sure that the USB cable is properly inserted into the port and that you’re using the correct type of cable for your controller.
Let’s take a look at the other troubleshooting steps you can take.
Ensure the USB port is not loose
Check whether the USB port of your PS4 controller is securely connected to the charging cable. If the port isn’t firmly attached, then you won’t get a proper connection and your controller won’t charge.
You can do this by disconnecting the USB cable and plugging it in again with some force. To avoid damaging your controller, grasp it firmly and make sure not to flex or twist it when plugging or unplugging the charging cable, as doing so may break off some of its pieces.
If you observe any damage to the port or feel that it’s lost after powering on your system, consider contacting Sony for assistance otherwise you’ll need to replace your controller. Make sure that you replace only an official Sony product that comes with a good fit guarantee otherwise you may run into similar problems further down the line.
Check for physical damage to the port
It’s entirely possible that your PS4 controller won’t charge due to physical damage to the USB port. This can be due to damaged or worn-out cables, bent connectors, or even dirt and debris clogging the works.
If you can confirm that the USB cables and adaptors are in good condition, then the best way to physically check the port is by taking a closer look at it with a magnifying glass. Be sure to examine carefully for any abnormalities such as bent pins or foreign object obstructions.
You may also want to use tweezers or a thin contact cleaner in order to remove any dirt or residue from the port. If you don’t have access to contact cleaner then consider using a basic rubbing alcohol solution diluted with water; this should help dissolve anything that is clogging up your controller’s connection points. Just be sure not to submerge any part of your controller in water when attempting any of these fixes!
Reset the PS4 Controller
Resetting it can help resolve many of the common issues you may be facing with it. From mild to more complex problems, resetting your controller can be a quick and easy fix to get your PS4 running again.
But how do you reset a controller? Let’s walk through the steps and see if it can help with your issue.Power off the PS4 console
In some cases, it may cause duplicate input on the console if it is not reset. This can be caused by a number of different things such as faulty USB cables or bad batteries. Before attempting to reset your controller, power off the PS4 console and disconnect all USB cables from both the controller and the console itself. This will allow your console to properly deactivate the controller and all associated peripherals.
Once you have powered it off, it’s time to reset your controller before attempting to charge it again:
- Press and hold the PlayStation button (PS logo in center) on the controller while simultaneously pressing and holding down the Share button (located on the left-hand side).
- Continue pressing both buttons until you hear a “single beep” sound indicating that your controller had been completely disconnected from your console (it should no longer show up as a device when connected via USB cable).
- Release both buttons after a single beep sound has emitted from the DualShock 4 controller. Both buttons should now be released and ready to attempt charging once more after successful disconnection.
Reset the controller
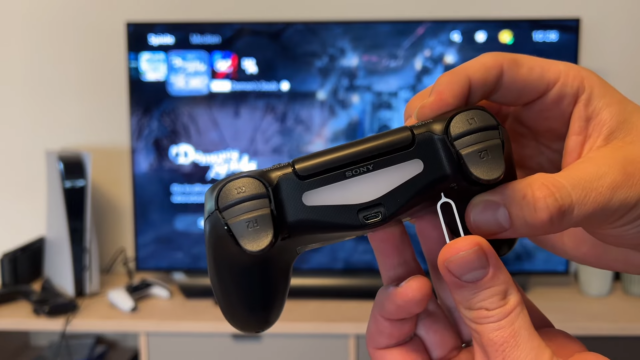
If the problem with your PS4 controller persists even after changing the USB cable and resetting your console, you may need to reset the controller itself. To do this, unhook the controller from all cables and hold the PlayStation button on your DualShock 4 wireless controller for at least 3 seconds. This will turn off the controller completely. After 3 seconds have passed, briefly press and release the PlayStation button again to power it back on.
Sometimes a bug in a specific game may prevent your PS4 controller from charging properly, so to make sure this isn’t interfering with recharging, try turning your console off completely before attempting to charge again. Once you successfully reset your PS4 Controller and reconnect it to your console you should be able to play once more.
If resetting does not fix the issue try troubleshooting with other methods found in this article or contact Sony support for additional assistance.
Check the Battery
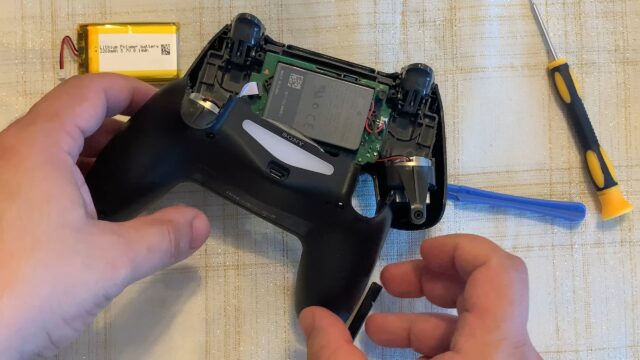
If your PS4 controller won’t charge, one of the first things you should do is to check the battery. Is there any visible damage on the battery pack or the battery connection? If yes, this could be the root of the problem. Make sure the battery pack is free of dirt and debris, and the connection is secure.
If the problem persists after checking the battery, read on to find other solutions.
Check the battery for any physical damage
A PS4 controller needs to be charged often, however, sometimes it may not charge properly due to different reasons. If your controller won’t charge, the first thing you should do is check the battery for any physical damage. This can be done by examining the contacts of both parts of the controller – check if they are clean and free from dirt or other deposits that might prevent a proper connection.
In addition to checking for physical damage on the outside of the battery and its contacts, you should also check its interior components such as circuit boards and wires. If there is any obvious damage or corrosion present, it will need to be fixed in order for your PS4 controller to properly receive power when plugged into a charger. Cleaning all surfaces carefully with a soft cloth (avoiding any abrasive materials) can help eliminate potential problems with charging before replacing parts.
Try a different battery
If your PlayStation 4 controller still won’t charge, you should try replacing the battery.
Fortunately, Sony makes it very easy to replace PS4 controller batteries. All you need is a Phillips head screwdriver and a new battery that is compatible with the PS4 controller. You can purchase replacement batteries from most electronics stores or online retailers.
When replacing your PS4 controller battery, make sure to do so very carefully and unplug the cable once finished — even if it’s not working yet. This will make sure that your new battery has enough power for its first charge. Additionally, don’t forget to check that any wires connected to the body of the controller are plugged in properly — this could be affecting how well your device charges.
After you have replaced the battery, plug in the cable again and try to activate the PS4 controller using a button or joystick on its control panel — if it powers up at all, then it means that either the original battery was faulty or something else is preventing proper activation. In any case, you should now be able to use your PS4 controller without any further problems!
Check the Power Supply
If your PS4 controller won’t charge, one of the first things you should check is the power supply. Make sure your console is plugged into the wall and that the power cord is firmly connected to the back of the console. Additionally, if you’re using a power strip, it should be turned on.
If all of this is in working order, continue reading for more easy fixes.
Ensure the power supply is firmly connected
Before you can make sure your PlayStation 4 controller is receiving power, you should check that the power supply is securely connected to your console. Check all of the cords between the console and the power supply, as well as any connecting wires that may be necessary.
Check the power supply for any physical damage
Checking the power supply for physical damage is an important part of troubleshooting if your PS4 controller won’t charge. Start by inspecting the cable and the connector that plugs into your console. Look for any frayed wires, bent prongs, or missing metal contactor pieces. If you find any defect, replace the power supply immediately with a new one. If everything looks normal, move on to the next step.
Examine the wall outlet that your PS4 power cord is plugged into as well and make sure it has not been damaged in any way. You also want to confirm that all of the connection points are tight and secure.
Next, take a look at your PS4 console as well and check to see if there are any signs of wear or damage. Are there any visible burn marks around where you plug in the power? If so, this could be causing interference with your power supply connection leading to problems charging your controller. Make sure everything is securely plugged in and running properly otherwise you may need to consider replacing some parts of your system to get things back running smoothly again.
Clean the USB Port
If your PS4 controller won’t charge, one of the best places to start is by cleaning the USB port of the device. This is a simple but often overlooked problem—the power from the port may not be able to get to your controller if there’s too much dust or debris clogging it up.
Let’s look at some other possible solutions for a non-charging PS4 controller.
Use a cotton swab to clean the USB port
If your PS4 controller is failing to charge, then it may be worthwhile to use a tiny cotton swab and lightly dust out the USB port on the console.
Before you start, ensure that both the swab and the port are dry. Insert one end of the cotton swab into the USB port, being careful not to push it in too far. Gently rotate and move around the inside of the USB port while keeping light steady pressure on it. Once complete, remove and repeat with a new end of a clean cotton swab until all visible dirt has been clearly removed.
If done correctly you should be able to witness any visible increases where dirt had built up over time in your PS4’s USB port has been successfully cleared out.
Use a can of compressed air to clean the USB port
Using a can of compressed air is another simple way to clean the USB port on your PS4 controller. Begin by unplugging the charging cable from the port and shaking out any dust that has been collected. Once finished, hold your controller so that the port faces away from you and gently blow into it using a can of compressed air. This will ensure that any remaining dust or debris is dislodged and removed.
Update the Firmware
One of the most common issues people have with their PS4 controller is it not charging. Usually, this is a problem with the firmware. In order to fix this, you’ll need to update the firmware of the PS4 controller.
In this section, we’ll look at how to update the firmware, as well as discuss some other fixes for when your PS4 controller won’t charge.
Connect the PS4 controller to the console with a USB cable
Connecting the PS4 controller to the console is one of the first solutions when finding a fix to a charging issue. By connecting your controller directly to the PlayStation 4 with a USB cable, your device may draw power and begin charging.
Simply plug one end of the USB cable into the DualShock 4, then plug it into any available USB port on your PlayStation 4 console. If successful, you should be able to power up your DualShock 4 by pressing and holding its PS button for 1-2 seconds.
Update the controller’s firmware
Updating the firmware is a great way to troubleshoot your PS4 controller charging issues. In order to do this, you will need a USB cable, either the Xbox One USB cable that came with your console or a generic one. Make sure the USB connection is secure, and then launch your settings menu.
Go to Devices in your settings, and then select Controllers. Select the “Update Controller” option and the console should automatically detect any wireless controllers associated with the PS4 system. If not, make sure you are connected properly via a USB cord and press OK. The firmware update may take a few minutes to download but once installed it should remedy any connection or power issues associated with your controller.
Re-pair the PS4 Controller
One way to troubleshoot a PS4 controller that won’t charge is to re-pair the controller with your PS4 console. This can be done by connecting the controller to the console via a USB cable and then pressing the PS4 button on the controller to synchronize it with the console.
In some cases, you may need to go through a few steps in order to get the controller to connect properly.
Power off the PS4 console
If your PS4 controller won’t charge, the first step is to power off the console. To do this, press and hold the PlayStation button in the center of your controller for at least three seconds. After a few seconds, you should see a message prompting you to turn off your console. You can also turn off your console by going to Settings > System > Shutdown or holding down the power button for about seven seconds until it turns off.
Once turned off, unplug any cables connected to your PlayStation 4 and leave it for around five minutes before turning it back on again. This will reset your system and may solve any software-related issues that could be causing problems with charging and connecting your controller.
Re-pair the controller
Re-pairing the controller with your PlayStation 4 system is relatively easy and only takes a few minutes to do. To re-pair your controller, you will need to power cycle your PS4, hold down the Playstation Button and Share Button on the controller simultaneously, and then re-establish the connection.
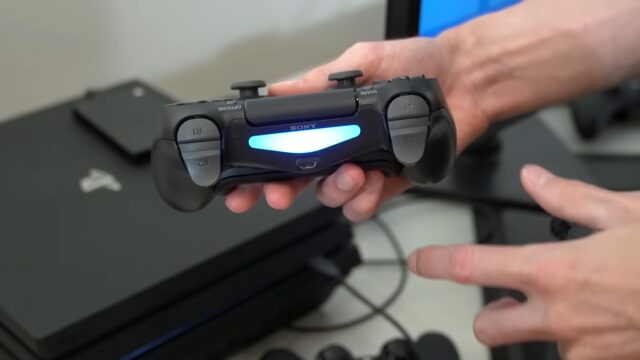
First, power cycle your PS4 by unplugging it from its power outlet for 30 seconds. Then plug it back in and hit the power button to turn it on again. Once your console has restarted, turn on your DualShock 4 controller using the middle PS button as usual. Then press and hold both the Playstation Button (located between the analog sticks) and Share Button (located between volume buttons) simultaneously for a few seconds until the light bar at the top of your controller begins flashing. This indicates that it’s searching for a connection with your PlayStation 4 system.
Once it has connected, you should see a couple of incoming notifications from other people in the party, if applicable. Lastly, press any button or D-Pad direction to see if there are any responses or feedback from that action — if so; You have successfully re-paired!
Replace the Charging Cable
Replacing the USB charging cable is one of the most common solutions to a PS4 controller won’t charge issue. Most controllers come with a standard USB cable and you can buy a new one from any electronics store. It’s important to note that this solution only applies if there is physical damage to your charging cable, such as fraying or a broken end. If your controller still won’t charge after replacing the cable, you should confirm that the power source is working properly before moving on to other solutions.
To replace your charging cable:
- Switch off your PS4 console and disconnect it from the power outlet.
- Carefully remove any debris from around the charging port on both ends of the USB cable.
- Plug your new USB cable into both ends and carefully ensure that it fits firmly into place without forcing it in or out.
- Switch on your console again while making sure that both ends of the USB cable are connected properly with no wiggling or maneuverability during normal use of your controller.
- Test your controller by pressing the PS button located at its center—it should light up accordingly to indicate proper functioning. If your controller does not light up, then try using another type of charging port such as a wall socket or powered USB hub for better results.
Replace the PS4 Controller
It may be time to replace it if none of the above steps fix the charging issue. Here are a few tips to help you make sure you select the correct replacement PS4 DualShock 4 controller.
First, check that the controller is an official Sony product, as knock-off controllers are not designed according to Sony’s specifications and may be of low quality. Also check that any used controllers you purchase haven’t been damaged or modified in any way, as this could interfere with their operation and prevent a proper charge.
Once you’ve found an official Sony product that’s in good condition, ensure that it has a USB-C port — this is necessary for it to be compatible with your PS4 console and charging accessories. You can double-check by reviewing its model number on the back of the controller casing; just look for ‘CUH-ZCT2U’ or ‘CUH-ZCT2E’ before buying it.
Finally, test out your new PS4 controller before committing: plug it in with a micro USB cable and press and hold down its share button until you hear two beeps — if successful, your new controller should connect straight away!
FAQs
How do I fix a loose charging port on my PS4 controller?
You can fix it by using a toothpick or a small object to push the charging port back into place.
How do I fix a broken charging cable for my PS4 controller?
You can fix it by replacing it with a new cable or fixing the damaged parts of the old cable.
Can I charge my PS4 controller while playing games?
Yes, you can charge it while playing games by connecting it to a power source.
How do I fix a PS4 controller that won’t charge or turn on?
You can fix it by resetting it, checking the charging cable and port, and replacing the battery if necessary.
Can I charge my PS4 controller using a USB hub?
Yes, you can charge it using a USB hub as long as it meets the power requirements of the controller.
How long does it take to fully charge a PS4 controller?
It takes about 2-3 hours to fully charge it.
Why is my PS4 controller charging slowly?
If it is charging slowly, it could be due to a low power output from the charging source or a damaged charging cable.
How do I know when my PS4 controller is fully charged?
When it is fully charged, the light bar on the controller will stop blinking and remain a solid color.
Can I charge my PS4 controller with a laptop or computer?
Yes, you can charge it with a laptop or computer as long as it meets the power requirements of the controller.
Why is my PS4 controller overheating while charging?
If it is overheating while charging, it could be due to a faulty battery or a damaged charging cable or port. Try using a different charging cable or replacing the battery to fix the issue.
Conclusion
In conclusion, a PS4 controller that won’t charge can be a frustrating problem for gamers. However, there are several easy fixes that can be tried before resorting to purchasing a new controller. Whether it’s resetting the controller, cleaning the charging port, or replacing the charging cable, there are multiple solutions to try.
By following the 10 steps outlined in this article, gamers can get their controller charging again and get back to their favorite games. It’s important to remember that while some of these fixes may work for some, they may not work for others, and in some cases, it may be necessary to seek professional help or replace the controller altogether. Regardless, the 10 easy fixes provided here are a good starting point for anyone experiencing charging issues with their PS4 controller.

