
Waterproofing your basement is a crucial step in maintaining a dry, safe, and healthy home. Basement waterproofing can prevent mold growth, and structural damage, and improve the overall value of your property.
For those inclined to tackle this task themselves, having the right tools and materials is essential. On the other hand, getting help from professionals is the best solution for waterproofing basement walls from outside.
This article will guide you through everything you need to know to successfully waterproof your basement.
1. Understanding the Need for Basement Waterproofing

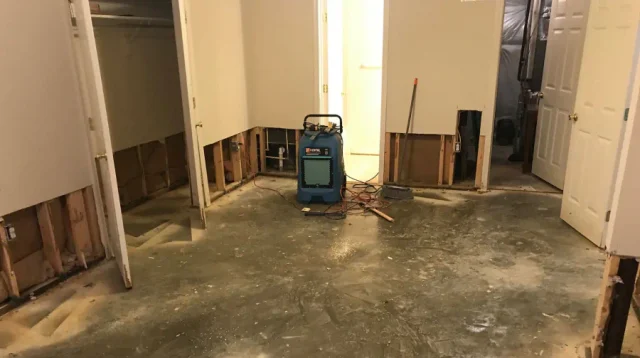
Basements are prone to moisture issues due to their below-ground location. Water can seep in through cracks in the walls, floors, or foundation, leading to dampness and mold. This not only poses health risks but can also compromise the structural integrity of your home. By waterproofing your basement, you can prevent these problems and create a usable, dry space.
2. Key Tools for DIY Basement Waterproofing
Having the right tools makes the job easier and more efficient. Here are the essential tools you’ll need:
a) Safety Gear
- Gloves: Protect your hands from harsh chemicals and rough surfaces.
- Safety Glasses: Shield your eyes from debris and splashes.
- Respirator Mask: Prevent inhalation of dust and fumes.
b) Surface Preparation Tools
- Wire Brush: Clean off loose debris and old paint from walls.
- Pressure Washer: Thoroughly clean surfaces to ensure better adhesion of waterproofing materials.
- Chisel and Hammer: Remove any loose mortar or concrete.
c) Repair Tools
- Caulking Gun: Apply sealant to cracks and joints.
- Trowel: Spread and smooth waterproofing compounds.
- Masonry Drill: Drill holes for anchors or drainage systems.
d) Application Tools
Paint Roller and Brushes: Apply waterproofing paint or sealant evenly.
- Putty Knife: Apply and smooth patching compounds.
- Squeegee: Spread liquid waterproofing membranes.
3. Essential Materials for Basement Waterproofing
Choosing the right materials is crucial for effective waterproofing. Here are the materials you’ll need:
a) Waterproofing Paint and Sealants
- Waterproofing Paint: Provides a barrier against moisture on walls and floors.
- Silicone Caulk: Seals small cracks and gaps around windows and pipes.
- Polyurethane Sealant: Flexible and durable, ideal for sealing larger cracks.
b) Patching Compounds
- Hydraulic Cement: Expands as it cures, making it ideal for sealing active leaks.
- Epoxy Crack Filler: Strong and durable, suitable for structural cracks.
- Acrylic Patching Compound: Easy to apply and perfect for minor repairs.
c) Membranes and Barriers
- Liquid Waterproofing Membrane: Creates a seamless, flexible barrier against water.
- Sheet Membranes: Prefabricated sheets that adhere to surfaces, providing a waterproof layer.
- Drainage Mats: Installed on exterior walls to direct water away from the foundation.
d) Drainage Systems
- French Drains: Installed around the perimeter to divert water away from the foundation.
- Sump Pump: Removes water that accumulates in the basement.
- Drainage Pipes: Direct water away from the foundation to a safe location.
4. Step-by-Step Guide to Basement Waterproofing

a) Inspect and Prepare the Basement
- Inspection: Check for visible cracks, mold, or damp spots. Use a moisture meter to identify hidden moisture issues.
- Cleaning: Remove all dirt, debris, and old paint using a wire brush and pressure washer. Allow the surfaces to dry completely.
- Repairing Cracks: Use a chisel and hammer to widen small cracks, then fill them with hydraulic cement or epoxy crack filler.
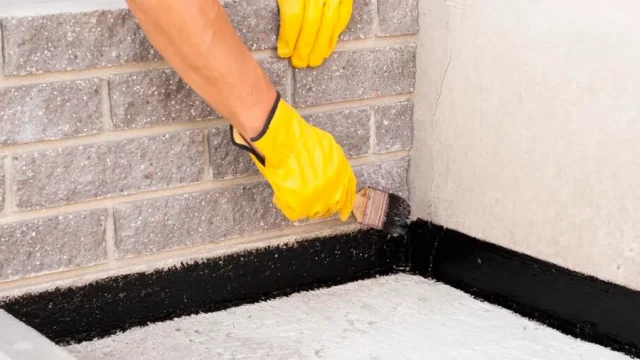
b) Apply Waterproofing Materials
- Seal Joints and Cracks: Use a caulking gun to apply silicone or polyurethane sealant to all joints, seams, and small cracks.
- Apply Waterproofing Paint: Use a roller and brush to apply waterproofing paint to walls and floors. Apply multiple coats for better protection.
- Install Membranes: Apply liquid waterproofing membrane with a squeegee for seamless coverage or attach sheet membranes as per manufacturer’s instructions.
c) Install Drainage Systems
- French Drains: Dig a trench around the perimeter of your basement, install perforated pipes, and cover them with gravel to direct water away from the foundation.
- Sump Pump: Install a sump pump in a pit at the lowest point of your basement to automatically remove accumulated water.
- Exterior Drainage: Ensure that your drainage pipes are properly installed and direct water away from your home’s foundation.
d) Final Inspection and Maintenance
- Inspect: Once the waterproofing materials have dried, inspect the basement for any missed spots or leaks.
- Test: Use a hose to spray water around the exterior foundation and check for leaks inside.
- Regular Maintenance: Periodically inspect your basement for signs of moisture and perform any necessary repairs promptly.
5. Additional Tips for Effective Basement Waterproofing
- Proper Ventilation: Ensure your basement has adequate ventilation to prevent condensation and mold growth.
- Gutter Maintenance: Keep gutters and downspouts clean and ensure they direct water away from the foundation.
- Landscaping: Grade the soil around your home to slope away from the foundation, reducing water accumulation.
6. Benefits of DIY Basement Waterproofing
a) Cost Savings
By doing the work yourself, you can save a significant amount of money on labor costs. The materials and tools required are readily available and relatively inexpensive compared to hiring professionals.
b) Increased Home Value
A dry, well-maintained basement can increase the value of your home. Potential buyers are more likely to be interested in a home with a waterproofed basement, knowing it is less prone to moisture issues.
c) Improved Health and Safety
Waterproofing your basement reduces the risk of mold and mildew growth, which can cause health problems for you and your family. It also prevents structural damage that can compromise the safety of your home.
7. Common Mistakes to Avoid
a) Ignoring Small Cracks
Even small cracks can allow water to seep into your basement. Make sure to repair all cracks, no matter how minor they may seem.
b) Skipping Surface Preparation
Proper surface preparation is crucial for the adhesion of waterproofing materials. Skipping this step can result in poor performance and the need for rework.
c) Using Inadequate Materials
Using low-quality or inappropriate materials can lead to failure. Invest in high-quality waterproofing products for long-lasting results.
d) Neglecting Exterior Solutions
Focusing only on the interior can be a mistake. Ensure you address exterior drainage issues to prevent water from reaching your basement in the first place.
Conclusion
DIY basement waterproofing is a manageable project that can provide significant benefits for your home. By having the right tools and following the proper steps, you will easily get through this project.


