So, you’ve got a blank page and a pencil, and now you want to make someone’s face pop right off the page. Sounds simple, right? But capturing a person’s features and their unique expression is an art that requires technique, patience, and a bit of practice. Portraits aren’t just about lines and shapes—they’re about bringing a person’s spirit and character into your sketch.
If you’ve ever felt a little stuck trying to get a face just right, don’t worry—you’re in good company. Let’s break down what you need to know to start drawing lifelike portraits today.
Key Points
- Focus on individual facial features first.
- Balance proportions for a natural look.
- Capture expressions to add character.
- Experiment with shading for depth.
- Practice and patience are essential.
1. Starting with the Basics: Eyes, Nose, and Mouth
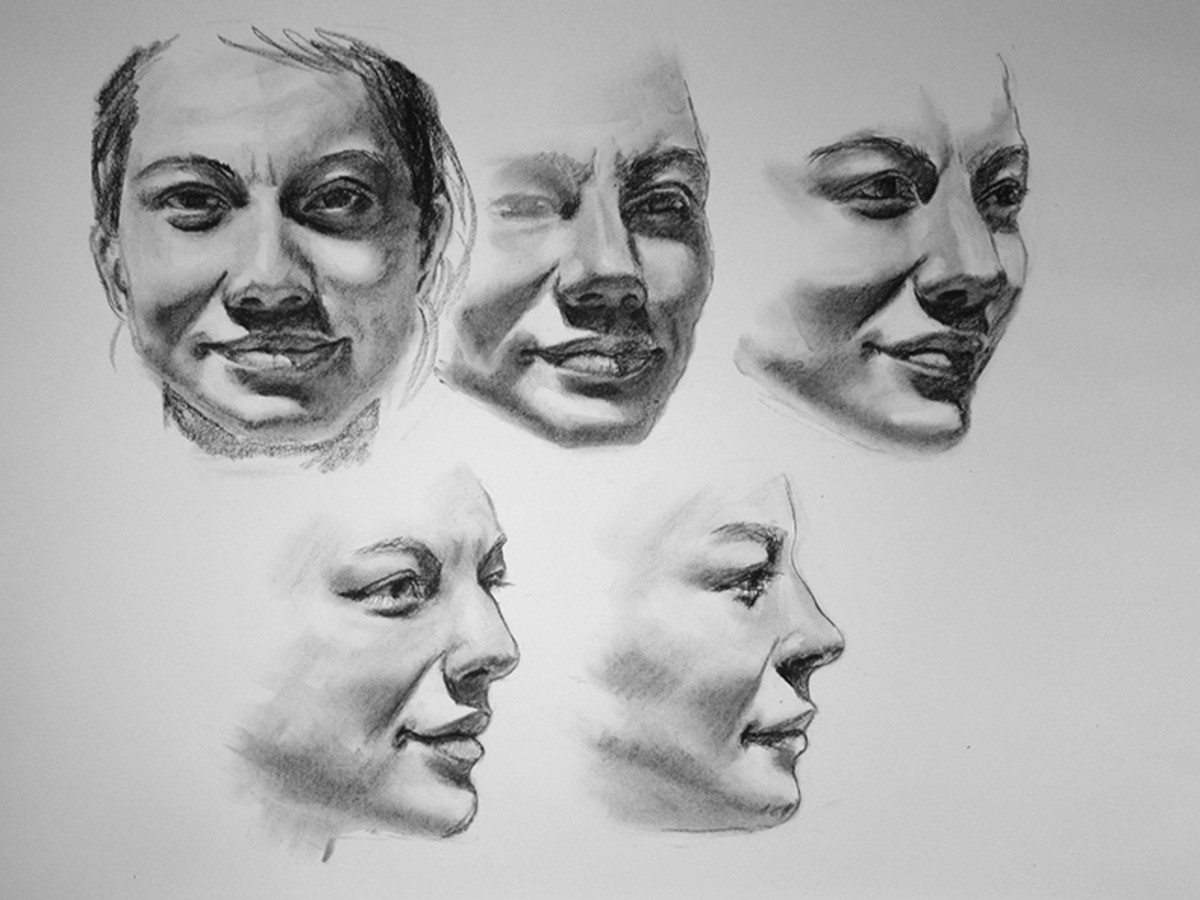
Let’s kick things off with the essentials. Eyes, noses, and mouths make up the core of a portrait, so you want to get each part just right. But don’t worry, you don’t need to be perfect. The trick lies in capturing the general shape and size of each feature in relation to the face. Think about how each feature connects. Eyes tend to be roughly one eye-width apart, while the nose generally ends in line with the inner corners of the eyes.
To get a sense of proportion without too much guesswork, consider a few guides online or try an in-person workshop. And if you’re keen on getting a beautiful family portrait without the pencil work, Families Portrait offers an option for those who want the look of a professionally done version. You can learn more about personalized drawing on their site.
2. Creating Life with Expressions
Now for the fun part. Expressions transform a static drawing into a lively face. Imagine a slight smile, a frown, or raised eyebrows. Small details create powerful emotions. Start by observing faces around you. Notice how eyebrows move, how cheeks change with different emotions, and how lines form around the eyes during a genuine smile. When you’re sketching, begin with neutral expressions, and as you get more comfortable, experiment with more complex expressions.
Here’s a tip: If a smile looks too cheesy or a frown too forced, adjust the eyebrows or the mouth. Expressions are subtle, and too much can make a face look unnatural. Play around, and don’t worry if the first few attempts look odd—expressions take practice!
3. Proportions: The Golden Rules
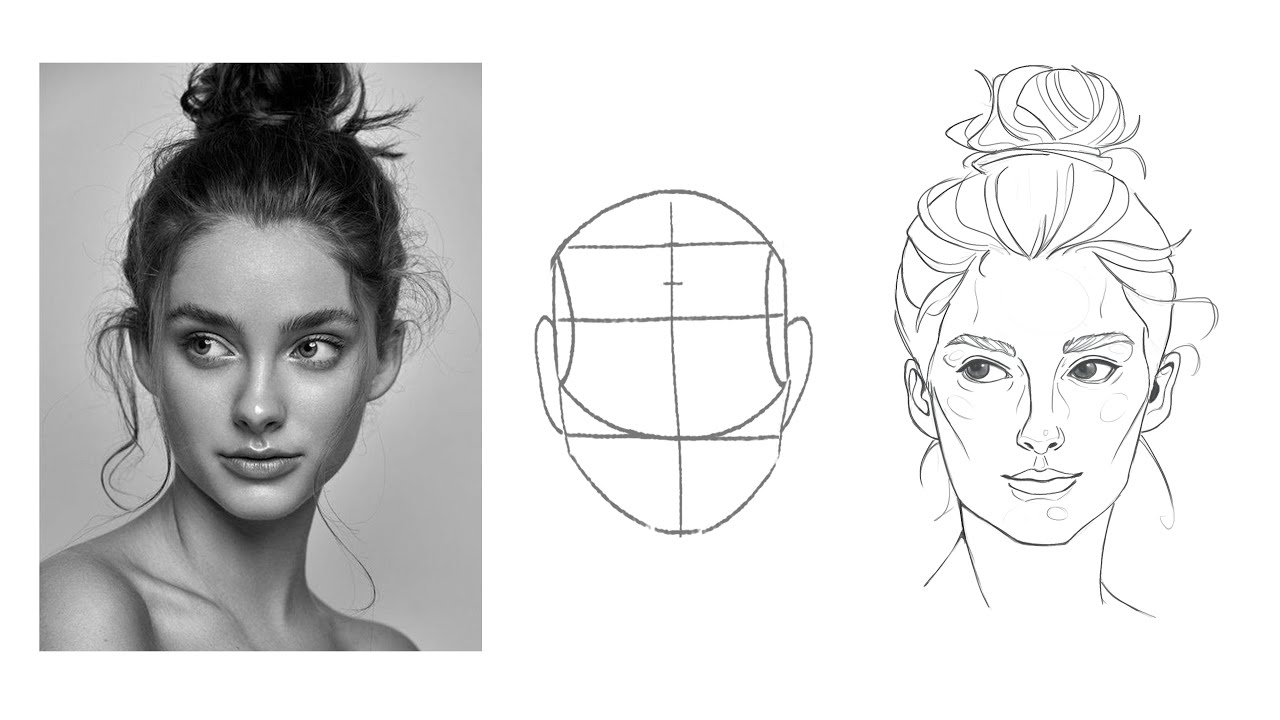
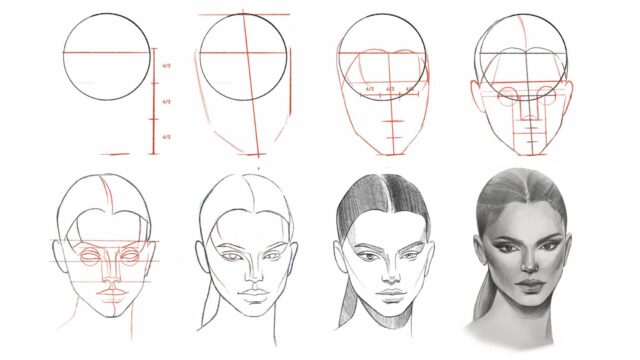
Think of proportions as the math behind your art. Each part of the face has a natural placement. A quick rundown: the eyes are placed at the middle of the head, the nose around halfway between the eyes and chin, and the mouth between the nose and chin. These guidelines prevent features from appearing too cramped or too spread out. A few tried-and-true tips for proportions:
- Divide the face into equal sections (forehead, eyes, nose, mouth).
- Keep the eyes one eye-width apart.
- Center the nose vertically under the eyes.
- Adjust the mouth width to match the distance between the pupils.
- Using these tricks, you’ll create a natural look that’s pleasing to the eye. And remember, perfect proportions don’t make a perfect portrait; they’re just a foundation.
4. Adding Depth with Shading
To give depth, practice subtle changes in light and dark to create highlights and shadows on the face. Areas like under the nose, around the eyes, and below the chin tend to have more shadow. With shading, less is often more. Build layers slowly and focus on blending—harsh lines rarely work well in portrait art.
A quick tip: Use the side of your pencil to create soft shadows and a smudging tool or your finger to blend. Experiment with different shading techniques, like hatching and cross-hatching, to see what fits your style best.
5. The Role of Practice in Perfecting Your Craft

Let’s be honest: no one masters portraits overnight. Every artist, no matter how talented, starts with practice sketches that probably look a bit off. It’s all about persistence. Try to set aside a bit of time each day to work on different parts of the face, like a series of eye sketches or a practice sheet of mouths. As you get comfortable, experiment with full faces, expressions, and shading. Small, daily sketches help build muscle memory and improve your skills over time.
6. Using Reference Photos to Guide Your Sketches
References provide a clear look at how features, proportions, and expressions appear in real life. Start with simple reference photos where the face is well-lit and straightforward, without odd angles or complicated expressions. Photos with natural light and minimal shadows give you a better sense of true proportions. Don’t get caught up in drawing every detail. Focus on the big picture—an eye shape, a basic mouth outline, or the way shadows fall across the cheeks.
7. Common Mistakes and How to Avoid Them

It’s easy to slip up when you’re new to portrait drawing. Here are a few common issues and how to avoid them:
- Overemphasizing certain features: Resist the urge to make the eyes or mouth larger than they are.
- Harsh lines for shading: Avoid pressing too hard when shading; subtle shadows work best.
- Symmetry obsession: Faces aren’t perfectly symmetrical, so don’t worry if one eye sits a little higher than the other.
- Skipping proportions: Rushing leads to distorted features. Use light guidelines to keep proportions on point.
Take note of these tips to sidestep some usual pitfalls. Remember, every mistake is a lesson.
FAQs
Q: How do I choose the right pencils?
A: Start with a range of pencils, like 2B for lighter lines and 6B for shading. A variety gives you options for soft and hard lines.
Q: How do I prevent smudging?
A: Use a piece of paper under your hand while you work. It stops oils from your skin from transferring to the paper and avoids smudges.
Q: What’s the best way to practice?
A: Start with individual features. Eyes, then mouths, and then full faces once you feel ready. This way, you won’t feel overwhelmed.
Q: How do I add texture to hair?
A: Focus on drawing hair in sections, using loose strokes to mimic strands. Don’t draw every hair. Work on the shape and flow.
Q: What if I mess up halfway through?
A: Keep going! Mistakes help you learn. You can always correct things with an eraser or adapt the portrait for practice.
Wrapping It Up
Portraits, including memorial portraits, require patience and a lot of practice, but with each sketch, you get closer to capturing lifelike expressions. Start with the basics, take note of proportions, and build on shading techniques to add depth.
Remember, portraits are a journey. Every face you draw adds something new to your skill set. Don’t be afraid to experiment and push your boundaries; before you know it, you’ll have a collection of portraits that truly capture character and expression.

