In today’s digital-centric world, a laser printer remains a staple both in our homes and bustling office environments. Every day, they tirelessly churn out countless documents, vivid photos, and vital presentations. However, despite their paramount importance, the routine maintenance of these workhorses often falls by the wayside.
But here’s the reality: similar to how a car needs its regular oil change, your laser printer requires consistent care to guarantee its optimal performance. In this guide, we’re presenting an all-inclusive checklist to keep your laser printer operating at its very best, ensuring each print is as crisp as the last.
Gather Your Supplies

Before diving into the cleaning process, it’s paramount to ensure you’re well-equipped for the task. To deliver a thorough clean to your laser printer, the essential tools in your toolkit should include:
A lint-free cloth: This ensures that no stray fibres linger after your cleaning, which could otherwise mar future prints.
Compressed air: The perfect solution for those stubborn dust particles that refuse to budge.
A soft brush: An indispensable tool for those hard-to-reach spots, ensuring a comprehensive clean.
Distilled water: Ideal for dampening your cloth; it cleans without leaving any mineral deposits behind.
Equipping oneself with the right tools can make the difference between a job done and a job well done. So, it’s always prudent to start on the right foot.
1. Turn Off and Unplug

At first glance, this step might seem elementary. Yet, it’s a vital one. Safety should always be your primary concern. Before commencing your cleaning spree, always ensure the printer is switched off and unplugged from its power source. This procedure isn’t just for your safety, but it also ensures the printer’s intricate electronic components remain safeguarded from unexpected electrical surges, which could cause irreparable damage.
2. Remove Toner Cartridge
The toner cartridge, often considered the beating heart of your colour laser printer, demands careful handling. Most printers come equipped with a front panel that can be effortlessly opened, granting you access to the cartridge. Once accessible, handle it with kid gloves, removing it gently and placing it in a shaded spot. Do remember, it’s delicate. Shaking or inadvertently dropping the cartridge might lead to unfortunate ink spills or even irreversible damage, leading to costly replacements.
3. Clean the Exterior

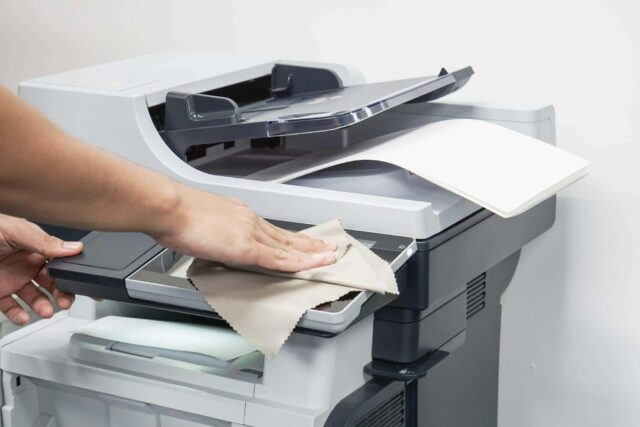
The external facade of your printer, though seemingly just a protective layer, plays an essential role in the printer’s overall health. Daily exposure to dust, occasional liquid spills, and even fingerprints can take a toll. Using your lint-free cloth, lightly dampened with distilled water (never drench it!), initiate a gentle wipe-down of the printer’s exterior. The aim is to remove any accumulated grime without inadvertently introducing moisture into the printer. Regular external cleaning not only keeps the printer looking pristine but can also enhance its longevity by preventing potential dust ingress.
4. Clean the Paper Trays
Paper trays might seem like simple, inconspicuous components, but they play a pivotal role in the smooth functioning of your printer. Over time, they can become repositories for dust, debris, and even tiny paper fragments. To start, carefully remove the paper trays from your printer. Using your soft brush, sweep away any evident debris. For a more thorough clean, a gentle blast of compressed air can dislodge more stubborn particles. Remember, a clean tray ensures consistent paper feed, which translates to fewer paper jams and smoother print operations.
5. Clean Inside the Printer

The inner sanctum of your printer is its lifeline. It’s where the magic happens. However, this area is also the most susceptible to the accumulation of dust and debris, which can adversely affect print quality over time. To begin, open your printer’s main access panel. Using your soft brush, gently brush away any visible dust. For a deeper clean, the can of compressed air will be your best ally. However, always maintain a safe distance to ensure you don’t damage any sensitive internal components. Above all, exercise caution to avoid touching or disturbing any electronic parts directly, as they can be delicate and, in some cases, expensive to replace.
6. Clean the Rollers
The rollers are the unsung heroes of your printer, ensuring that each sheet of paper is pulled and processed seamlessly. Over time, they can accrue grime, which might lead to frequent paper jams. To clean them, first locate and gently remove them, referring to your printer’s manual if necessary. Using a lint-free cloth slightly moistened with distilled water, wipe each roller meticulously. Ensure they are entirely dry before reinstalling them. Clean rollers can drastically reduce paper jams, ensuring that your printing process remains uninterrupted.
7. Use Compressed Air
We’ve mentioned compressed air a few times, and that’s because it’s a godsend for printer maintenance. It’s especially effective for reaching those areas inside your printer that a brush or cloth can’t access. When using compressed air, always maintain a safe distance to ensure the force isn’t too strong, potentially dislodging or damaging internal components. A gentle, controlled burst can work wonders in dislodging stubborn dust particles, ensuring the insides of your printer remain as clean as the day it was purchased.
8. Reassemble and Replace Toner
Now that your printer is spick and span, it’s time to put everything back together. Carefully reinsert any components you’ve removed, especially the toner cartridge. Ensure the cartridge is securely in place, as an improperly installed cartridge can lead to printing issues. Always refer to your printer’s manual for guidance if you’re unsure, as each model can have slightly different assembly instructions.
9. Test the Printer
Once you’ve reassembled your printer, it’s wise to conduct a test print. This ensures that all components are functioning correctly and that the cleaning process hasn’t inadvertently introduced any issues. If there are any anomalies in the test print, it might require some troubleshooting. Always have your printer’s manual on hand for reference.
10. Regular Maintenance Schedule
Like all well-oiled machines, establishing a routine for your laser printer’s maintenance is crucial. Regular cleaning not only ensures optimal print quality but also extends the printer’s lifespan. Depending on usage, a monthly or quarterly cleaning routine is typically recommended. By investing a bit of time in routine care, you’ll save on potential costly repairs or replacements down the line.
Conclusion
In the world of printing, you can choose from various types of printers, such as laser pritners, all-in-one inkjet printers, and large format plotters, depending on your specific requirements.
In the grand scheme of office equipment, a laser printer might seem like a humble device, yet its role is undeniably vital. By following this comprehensive maintenance checklist, you’ll ensure that your printer remains in prime condition, ready to deliver impeccable prints every single time. Here’s to many more years of flawless printing with just a bit of routine care!


